
LOOPRAN is an AE script designed to create endless physical random animations. It also features a convenient launcher function that allows you to execute 35 different functions with a single click, from composition creation to animation application. Additionally, you can customize over 40 settings to streamline your workflow and make it more efficient.
Setup
Using Aescripts + AEPlugins Manager
Using Aescripts + AEPlugins Manager makes installation and license management easy.
To install a trial, select ‘Add Trial’ from the ‘Account’ menu.
aescripts + aeplugins manager : https://aescripts.com/learn/aescripts-aeplugins-manager-app/
If Not Using Aescripts + AEPlugins Manager
- Extract the downloaded file,
LOOPRAN_V[version number].zip. - Open the extracted folder,
LOOPRAN_V[version number]. - Move the following two files (jsxbin, txt) to the ScriptUI folder.
- LOOPRAN.jsxbin
- LOOPRAN_README.txt
Windows:Program Files\Adobe\Adobe After Effects <version>\Support Files\Scripts\ScriptUI Panels
macOS:Applications/Adobe After Effects <version>/Scripts/ScriptUI Panels
Launch
- Select “LOOPRAN.jsxbin” from the “Window” menu to launch.
- If a script alert appears, follow the instructions and change the following settings.
To enable LOOPRAN, go to Preferences – Scripts & Expressions and check the box for “Allow Scripts to Write Files and Access Network.”
- If the license key input screen appears, enter the license key and press OK.
- If you are using the trial version, leave it as “trial” and press OK.
- If “LOOPRAN.jsxbin” does not appear in the Window menu, check if LOOPRAN.jsxbin is inside the ScriptUI Panels folder.
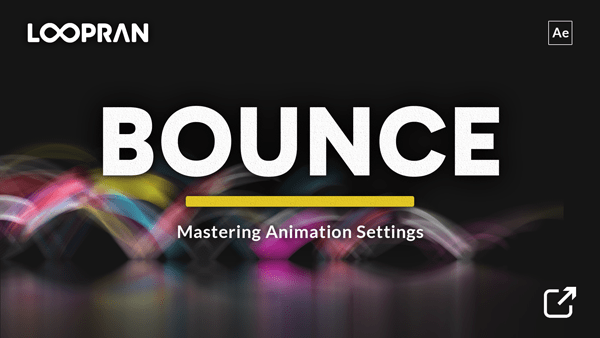
Quick Start: Let’s Bounce an Elliptical Shape!
First, let’s create a gradient background and animate an elliptical shape to bounce. It will be completed in just four clicks.
- Press the [Create Comp] button located in the center of the “Project Item” group.
- Press the [Create Gradient Shape] button, which is the second from the left in the “Preset Shape” group.
- Press the [Create Ellipse Shape] button, which is the third from the left in the “Preset Shape” group.
- Press the [Apply Bounce Animation] button, which is the first on the left in the “Animation” group.
This completes the process. When you play it back, the bounce animation will repeat infinitely.
Also, by duplicating the pre-composed ellipse layer, you can create different patterns of random animations.
Feature Overview
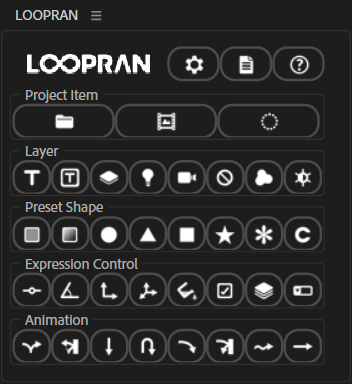
LOOPRAN features 38 buttons that can be executed with a single click. Here, I’ll explain each button in order from the top of the main screen.
LOOPRAN automatically switches between vertical and horizontal layouts when the window size is changed. If you prefer to fix the layout in either vertical or horizontal mode and disable automatic switching, you can change this from the settings screen. For more details, please refer to the LOOPRAN settings.

Options (Header)
Display various LOOPRAN option windows.
Open the settings window. You can change various settings related to LOOPRAN.
Open the log window. It displays error details and reasons why actions could not be executed.
Open the help window.
- When you hover your mouse cursor over each setting in the settings window, a help tip will be displayed with explanations.
- The log window displays the latest 50 execution logs.
Project Item
Create various project items with one click.
Create a folder.
Create a composition.
Create an animation target.
- Creating a folder will create it in the selected hierarchy by default.
- For composition creation, you can change the composition settings from the settings screen.
- An animation target refers to a predefined composition that LOOPRAN recognizes as an animation target. For more details, please refer to the section on How Animation Works in this article.
Layer
Create various layers with one click.
Create a text layer.
Create a paragraph text layer.
Create a solid layer.
Create a light layer.
Create a camera layer.
Create a null object layer.
Create a shape layer.
Create an adjustment layer.
- The default text string for creating text layers and paragraph text layers can be changed from the settings screen.
- The area size of paragraph text layers can be changed from the settings screen.
- The color of solid layers is fixed by default, but can be changed or set to random colors from the settings screen.
Preset Shape
Create a preset shape with one click.
Create a solid shape layer that fills the composition.
Create a gradient shape layer that fills the composition.
Create an ellipse shape layer.
Create a triangle shape layer.
Create a rectangle shape layer.
Create a star shape layer.
Create a flower shape layer.
Create a control layer to manage property values and expressions in one place. This function is different from other preset shapes and is intended for users who use expression control effects.
- The color of fill shapes can be changed to a specified color or set to random colors.
- For gradient shapes, the start and end colors can be changed to specified colors or set to random colors. It is also possible to change the angle and gradient type.
- Various shape sizes and colors can be changed to specified colors or set to random colors.
Expression Control
Apply an Expression Control effect to the selected layer with one click.
Add a slider control effect to the selected layer.
Add an angle control effect to the selected layer.
Add a point control effect to the selected layer.
Add a 3D point control effect to the selected layer.
Add a color control effect to the selected layer.
Add a checkbox control effect to the selected layer.
Add a layer control effect to the selected layer.
Add a dropdown menu control effect to the selected layer.
- With LOOPRAN, you can add an expression control effect to the selected position.
Animation
Apply animation to the selected layer with one click.
Apply a bounce animation to the selected layer. When you change the position or angle of the ground, the animation will follow the new ground.
Apply a bounce reflect animation to the selected layer. You can change the position of the wall.
Apply a fall animation to the selected layer.
Apply a toss up animation to the selected layer.
Apply a side toss animation to the selected layer.
Apply a side toss reflect animation to the selected layer. The position of the wall can be changed.
Apply a wave animation to the selected layer. Changing the position or angle of the wave center axis will animate it along the new center axis.
Apply a zero gravity animation to the selected layer.
- Only one type of animation can be applied in a single composition.
- If you apply an animation to a selected layer other than the animation target, it will be pre-composed. For more details on how this works, see the How Animation Works section in this article.
- For detailed customization of each animation, see the Animation Settings section.
How Animation Works
Explain how animation works.
What is the Animation Aarget?
The animation target is the predefined composition that LOOPRAN requires to apply an animation.
Create an animation target
There are two ways to create an animation target. Regardless of the method used, it will result in a composition in the animation target format.
- Create an animation target using the [Create Animation Target] button in LOOPRAN
After creating the animation target, place text layers, shape layers, and trimmed images. Use this method if you want to pre-build the animation target yourself.
- Automatic creation by applying animation
When you select a layer and apply an animation, it will be pre-composed and automatically converted to the animation target format. The behavior varies depending on the type of layer as follows.
It will be pre-composed into the animation target format, and the size will be automatically recognized.
Each character will be pre-composed into the animation target format, and the size will be automatically recognized.
It will be used as-is without being pre-composed.
It will be pre-composed into the animation target format, and the size will be recognized so that the long side becomes the diameter.
- Once it has been converted into the animation target format, it can be placed in other compositions and have animations applied without being pre-composed any further.
- When an animation is applied to a text layer, the font style of the first character is applied to all characters. If you want to change the style individually, do so in the pre-composed composition after applying the animation.
Editing an animation target
When you open an animation target, the following two layers will be automatically created.
A control layer for managing the animation target.
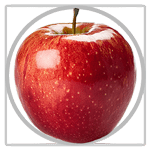
A circle representing the target size recognized by LOOPRAN. LOOPRAN calculates animations based on this circle’s size. Therefore, adjust the target to maximize within this yellow circle.
To adjust the size automatically … After selecting the target layer, long-press the [Create Animation Target] button.
If automatic adjustment fails or manual adjustment is needed … Change the value of [TargetSize] in the [Control_Target] layer.
When you create a new animation target, after placing the layers you want to display, you can adjust the size of the yellow circle either automatically or manually to complete the animation target. If the animation target was created automatically by applying an animation, adjust the size of the yellow circle if necessary to finish.
Additionally, if you change the size, adjust the yellow circle size automatically or manually.
The following layers can automatically adjust size by long-pressing the [Create Animation Target] button:
Automatically calculates based on the shape’s vertex coordinates and Bézier handles.
Automatically calculates based on the shape of the text.
Adjusted content refers to square-trimmed images or compositions that are adjusted to draw a circle touching the square and maximize within the circle. These can automatically calculate size.
Running the Animation
LOOPRAN calculates animations based on the size of the yellow circle in the animation target. Therefore, if the target extends beyond this circle, the animation may not function correctly.
Additionally, if applying effects such as glow to the animation target causes the glow area to intrude into the display area, resulting in an unnatural animation, increase the “StartPointOffset” value in the animation settings. This will cause the waiting position for each animation cycle to be further from the display area, thus hiding the glow portion.
Animation Settings
Animations applied using LOOPRAN can be customized with 22 different settings. Here, we’ll provide a detailed explanation of the animation settings.
How to Configure Animation Settings
When you apply an animation, the following named control layers will be automatically created.
- Bounce … Control_Bounce
- Bounce Reflect … Control_BounceReflect
- Fall … Control_Fall
- Toss Up … Control_TossUp
- Side Toss … Control_SideToss
- Side Toss Reflect … Control_SideTossReflect
- Wave … Control_Wave
- Zero Gravity … Control_ZeroGravity
To change the animation settings, adjust the property values of the expression control effects applied to the above control layers.
Animation settings can not only be changed by adjusting property values, but also dynamically by using keyframes and expressions.
Animation Setting Change Results
For the actual effects of the changed settings, please check the following video.


Animation Settings Description
There are 22 different types of animation settings in total. The available settings vary depending on the applied animation, but here are all the settings:
Gravity acceleration settings applied to the animation target. Negative values will reverse the direction of gravity. The default value of 3920px/s² corresponds to gravity acceleration when considering 400px as 1 meter.
Settings for the ratio of reaction force when exceeding the boundary. The default value of 1 corresponds to a reaction force equal to gravity. A value of 2 will result in a reaction force twice that of gravity.
Settings for the variation range of the reaction force ratio. With the default value of 10%, the reaction force ratio will randomly vary between 90% and 110%.
Settings for the X speed of the animation target. Positive values move to the right, while negative values move to the left.
Settings for the variation range of X speed. With the default value of 15%, the speed will randomly vary between 85% and 115%.
Settings for the Y speed of the animation target. Positive values move up, while negative values move down.
Settings for the variation range of Y speed. With the default value of 15%, the speed will randomly vary between 85% and 115%.
Settings for the damping ratio of the animation. With a default value of 0.8, the animation will reduce by 20% each time it lands. A value of 1 means no damping.
Settings for the variation range of the damping ratio. With a default value of 10%, the damping ratio will randomly vary between 90% and 110%.
Settings for whether the animation target automatically rotates in the direction of movement. The default is OFF.
Settings for whether the animation target mirrors horizontally when moving to the left. This is only effective when DirectionFollowMode is ON. The default is OFF.
Settings for the rotation speed of the animation target. Positive values rotate clockwise, while negative values rotate counterclockwise.
Settings for the variation range of rotation speed. With the default value of 15%, the rotation speed will randomly vary between 85% and 115%.
Settings for the scale of the animation target. The default value of 100% is the original size.
Settings for the variation range of scale. With the default value of 15%, the scale will randomly vary between 85% and 115%.
Settings for the random pattern of the animation. Changing the value will create a different random animation.
Settings for the number of animation repetitions. A value of 1 or more will repeat the specified number of times, and -1 will repeat infinitely.
Settings to shift the start time of the animation. Positive values shift to the future, while negative values shift to the past.
Settings for the playback speed of the animation. The default value ‘time’ plays at normal speed, while ‘time*2’ plays at double speed.
Settings for the overall scale of the animation. For a composition in 4K, setting it to 200% will scale it to 2K.
Settings for the offset of the animation start position. If effects like glow applied to the animation become visible, increasing this value can help hide them.
Settings for the random delay amount of the animation. When set to 0, there is no waiting time. Increasing the value extends the random waiting time for each cycle, increasing the randomness.
LOOPRAN settings
The following explains the customizable settings available from the LOOPRAN settings screen.
General tab
These are the settings related to the overall LOOPRAN.

Switch the display language of LOOPRAN and the items it creates.
Switch the type of icons
Switch between fixed and automatic layouts for LOOPRAN.
Switch the header display position of LOOPRAN to the top or bottom.
Switch whether to display the logo in the header of LOOPRAN.
Switch whether to display each feature group in LOOPRAN.
Switch the layer creation position.
Switch the effect addition position.
Set the long press duration for buttons. When the button is pressed for the specified time or longer, the long press function for that button is executed. The time can be set within the range of 100ms to 1000ms.
Set whether to add operational instructions to the comment section of layers and other items.
Project Item Tab
Settings related to project item.
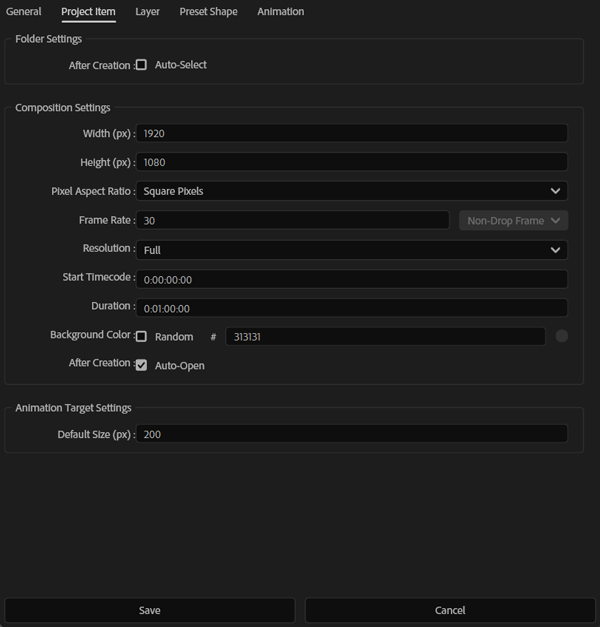
When checked, the created folder is automatically selected and can be nested by pressing continuously. When unchecked, the original selection is maintained, so it is created at the same level.
Set the composition width.
Set the composition height.
Set the pixel aspect ratio of the composition.
Set the frame rate of the composition.
Toggle the drop frame setting. This setting is only used when the frame rate is 29.97 fps or 59.94 fps.
Set the composition resolution.
Set the composition start timecode.
Set the composition duration.
Toggle between changing the background color randomly each time or fixing it to a specified color.
Set whether to automatically open the composition after creation.
Set the initial size of the creation range (yellow circle) for the animation target.
- The composition-related settings will only apply to compositions created in LOOPRAN.
Layer Tab
These are settings related to layers.
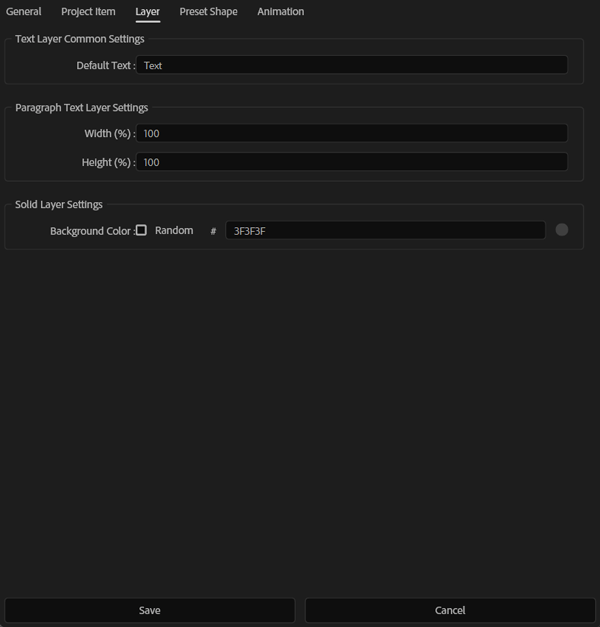
Specify the default text to input when creating a text layer or text box layer. Leave it blank if no text input is desired.
Set the width of the paragraph text for the composition as a percentage. At 100%, it matches the width of the composition. It can be set between 5% and 100%.
Set the height of the paragraph text for the composition as a percentage. At 100%, it matches the height of the composition. It can be set between 5% and 100%.
Toggle between changing the background color randomly each time or fixing it to a specified color.
Preset Shape Tab
These are settings related to preset shapes.
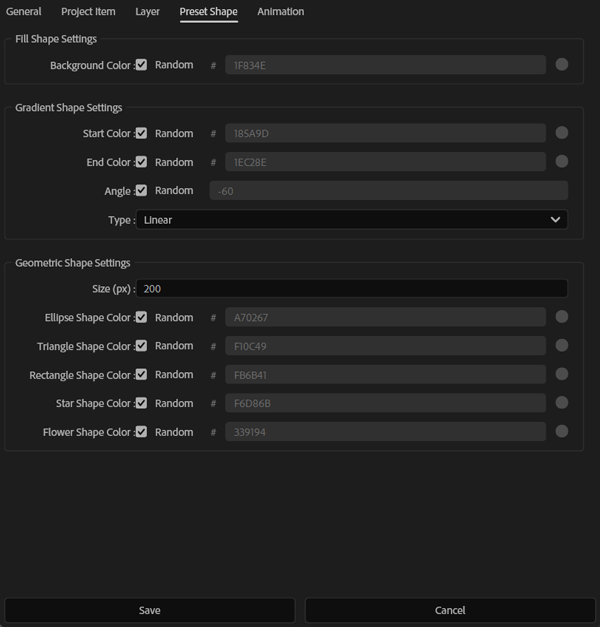
Toggle between changing the background color randomly each time or fixing it to a specified color.
Toggle between changing the start color randomly each time or fixing it to a specified color.
Toggle between changing the end color randomly each time or fixing it to a specified color.
Toggle between changing the angle randomly each time or fixing it to a specified angle.
Set the type of gradient.
Specify the size of the shape. This size is common for ellipses, triangles, rectangles, stars, and flowers.
Toggle between changing the ellipse shape color randomly each time or fixing it to a specified color.
Toggle between changing the triangle shape color randomly each time or fixing it to a specified color.
Toggle between changing the rectangle shape color randomly each time or fixing it to a specified color.
Toggle between changing the star shape color randomly each time or fixing it to a specified color.
Toggle between changing the flower shape color randomly each time or fixing it to a specified color.
Animation Tab
These are settings related to animations.
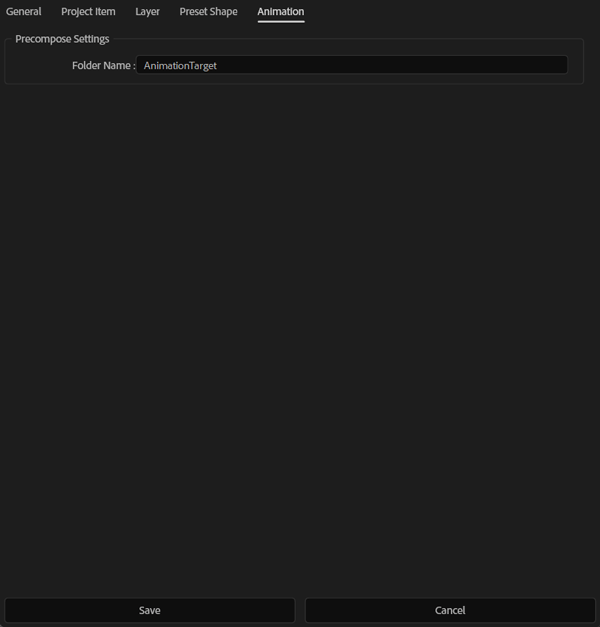
Specify the folder name where precomposed compositions will be automatically stored when applying animations. Leave blank if you do not want to move them to a folder.